New blades are necessary for your circular saw to keep it running smoothly and efficiently. This process is easy but does take some time if you are going at a quick pace. Everything is explained step by step to teach you how to change circular saw blades.
A dull blade is more of an encumbrance than anything else. It will be hard to make precise cuts, and you may experience kickback from your blade, which could do some serious damage if not dealt with immediately.
The basic premise behind these tools is not that different, so do not let their little differences throw off your routine. Let’s not waste our time and dive in to know how to change a circular saw blade:
The Guide to Replacing Circular Saw Blades:

It is not a challenging task to change blades on all sorts of circular saws. It only takes a few minutes of hands-on time with the tool and some patience for adjustments. Look at the following steps to know how to change the blade of a circular saw:
STEP 1: Safety is Your Top Priority:
It is important to be safe when operating a power tool. Always make sure the saw blades are unplugged and remove any batteries from the circular devices before starting work on them, or else you could end up having an accident.
Circular saw blades are sharp, so it is important to wear gloves when working. Also, the carbide tips on these make them more likely to cut you if your hand slips while trying to loosen up a tight blade bolt because they are pointy.
Furthermore, if your machine comes with a manual, it would be nice to go through it before operating it. This helps replace your blades when needed and tells where specific tools, like a wrench, can be found, so we do not accidentally over tighten or loosen something.
STEP 2: Detach the Old Blade:
No, find the wrench that comes with your machine. Most corded models have an open-end design, while battery-powered ones often come equipped with Allen wrenches so that they can be attached at various points on top or bottom of the unit for added convenience during use. You might need a socket or open-ended wrench if your Allen key is missing. An adjustable wrench will do in a pinch, but working with such limited space is hard.
Furthermore, unfasten and tweak the base plate – it determines the depth of cut – to allow space for mechanics around the blade bolt. Finally, lock it into the place when finished working with one side, then unlock it before proceeding onto the next section of your project.
You will find a blade lock button on the rear of the upper guard. Place your wrench over the bolt and turn it with one hand until you feel a secure click.
Now, use both hands to depress fully, and then release as needed while still turning counterclockwise on top of yourself, slowly unscrewing down until there is no more resistance from each side.
Unscrew the Bolt:
The old turn-left-to-loose and turn-right-to-tight rules are less of a factor on circular saws because you can change which way the blade rotates. However, if one side loosens more than another, it is likely due to dirt or debris getting inside, so make sure your equipment stays clean.
To tighten the screw on your left-handed tool, loosen it clockwise or anticlockwise to tighten it, whereas the right-handed saw will get tightened clockwise and vice versa.
Circular Saws without Blade Lock:
- If your circular saw does not have a blade or shaft lock, there are two ways you can use it to hold the cutting tool in place while loosening up that bolt.
- The primary step is to elevate the base plate so that some teeth on your blade will be able to be pressed into wood or something else. While pressing down with pressure, follow these instructions above and loosen any bolts holding it in place until you remove them.
- Next, to prevent accidental slips and sudden cuts, it is important to secure your blade with Vice-grips or other lockable pliers while loosening the bolt.
- If the blade does not come off, use a wrench. Tap it gently and quickly while giving the motor some force with your other hand.
- Afterward, remove the outer washer and set it with a wrench.
- Compatible with Samsung’s Easy Setting Box software.
- After carefully removing the blade from its mounting point on top of a metal shaft, it is possible to remove it by lifting and rotating a plastic guards
Credits to: Try Adapt Learn Youtube
STEP 3: Mount the New Blade:
Inspect the inside of your tool before installing a new blade to make sure there is no lodged debris and that you have removed all loose particles. Cleanliness is the key.
When installing a new blade, look for an arrow that shows which way it should be oriented. Most saws will have one of these arrows on their guards. Make sure you flip it, so they both face in similar directions when using them together in the same sections within your machine’s bodywork.
Place the blade of your circular saw up into its holder, ensuring that it is secure against the plate and inner washer. Make sure you retract both guards before starting work.
Place the washer over your shaft and turn it until you hear a click. Once in place, snug against the blade.
Your blade will fall off if you do not tighten it properly. Make sure the handle is tight, then use a wrench and turn in 1/8th of an inch more than finger-tight. Make sure not to over-tighten it.
STEP 4: Check Your Circular Saw Blade & Start Working:
Depending on the type of your circular saw, you can plug it in or insert the battery.
If your saw has a brake, you should use it now. As soon as the motor starts and feels smooth with no wobble from blade spin or vibration in general, then release to stop immediately.
Moving on, try a piece of wood as an experiment to ensure your blade is cutting through seamlessly.
When the blade of your saw gets stuck, it can be frustrating. If you find that all this does is spin back and forth without cutting anything or moving at all through, then remove your machine from the material immediately, unbolt it, and fasten it.
Repeat it until your tool is working smoothly.
| Read Here: How to Sharpen Circular Saw Blade? |
In the End:
If a circular saw blade has worn out, it can put more wear on the motor and make the worst results in your project. Tool outlets even offer recycling programs where you trade in an old one for credit towards buying yourself some new ones, so there’s no reason why anyone should keep using them.
But, after reading our guide, you should have all the knowledge necessary to change circular saw blades. You now know how to change circular saw blades confidently and with precision.
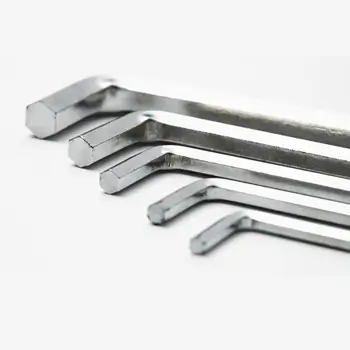
It is important to remember that replacing the blade is a straightforward procedure that varies little from one model to another. Remember, you may need a hex wrench instead of just your standard pliers.